Quantcast
Channel: Ruchik Randhap (Delicious Cooking)
Viewing all 331 articles
Browse latest View live

Simple Pumpkin Sukhe

$
0
0

Last month when I was at my in-law's in the midst of her mid morning cooking session she asked me if I knew how to cook this simple pumpkin dish. I quickly dropped whatever I was doing and bolted to the kitchen and said that I wanted to learn. It was raining cats and dogs outside and I had this warm fuzzy feeling inside me telling me that lunch that day was going to be a delicious one. There was red boiled rice kept in the hot box waiting to be strained, there was an awesome prawn & potato curry still bubbling on the stove and some breadfruit marinated with meet mirsaang (salt & chilli paste) waiting to be shallow fried. Lunch was going to be awesome. I was already salivating. I was starved and couldn't wait to eat. 
As always I welcomed the idea of having a simply prepared vegetable along with this gorgeous spread. I am quite a vegetarian at heart if you ask me as I prefer having my veggies any day so that way I am low maintenance. I don't need fancy non veg food for sustenance. The recipe seemed so simple that I was really eager to taste the final outcome. In the snap of a finger I was done making this dish and in no time the pictures were shot and food was served. I had a good meal that day followed by an afternoon siesta. Sigh! I miss my vacation already. 

I hope you enjoy this very simple, no nonsense, easy pumpkin saute/stir fry or sukhe (but without coconut) as we call it. 


Simple Pumpkin Sukhe
(Printable Recipe)

Prep time: 15 mins | Cook time: 10 mins | Serves 2-3

Ingredients:
  • 1-1/2 cups thinly chopped pumpkin
  • 1/2 medium sized onion finely sliced
  • water as required
  • salt to taste
For the tempering:
  • 1/2 teaspoon mustard
  • 2 dried red chillies (I used the round ones also called as Madras chillies)
  • 2 tablespoons oil
Method:
1. In a heavy based pan/kadhai heat the oil. When the oil is hot add the mustard and wait for them to splutter. When they stop spluttering toss in the broken red chillies. Reduce the heat and let the chillies sizzle for a few seconds. Take care not to burn them (they will impart a bitter taste to the dish)
2. Next, add the sliced onion and fry until they turn pale/translucent. Now add the chopped pumpkin and add enough water to cover the pieces.
3. Add salt to taste and cook covered on a medium low heat till all the pieces are cooked and tender.
4. Remove from heat & serve hot with rice or chapathis.

Ultra Crispy Onion Rings - The Best Ever! ~ When The Hubby Cooks!

$
0
0

So the sonny boy gets his food wishes honoured by his dad once in a while. Once in a while would be an understatement as he gets his way around almost everyday. Most times I insist that he eats what is cooked but on some occasions we oblige him by preparing things that he relishes eating. When it comes to replicating fast food at home I am satisfied that what we make at home is any day better than the junk dished out by most fast food joints. The best part about living in the internet age is that recipes of foods from around the world are available at our fingertips. The onion rings have been one of our lil boy's favourite snacks and the husband has tried replicating them several times using different recipes but none of them were 100% satisfactory - in terms of their taste and crispness or rather the ability to stay crisp much after they came out of the deep fryer. 

We used to enjoy some crisp onion rings at TGIF, Mumbai and always wondered how they stayed so crisp for a long time. 


 A couple of months ago Roshan was gallivanting on youtube checking out food videos and he chanced upon this great video on foodwishes.com that showed precisely how you can make ultra crisp onion rings at home. He immediately ran down to the supermarket to buy some instant mashed potato powder as it was the only ingredient we didn't stock at home. For those of you in India, don't fret, you will be able to find the mashed potato powder in most well stocked supermarkets. Also, Panko breadcrumbs are our favourite brand as the result they give is always great - I do hope you find them as I believe they go out of stock often.  I searched for them high & low here in Dubai but none of the supermarkets stocked it. When I was lucky to find some at Spinney's it had an additional flavouring - Tempura, so I didn't buy. If you ever find plain Panko crumbs just buy them! Now we generally buy them from Mumbai and stock up 2-3 packets per year.


These onion rings were so so crispy that we could actually hear them crackle when we munched them. Thanks to that, the photo shoot didn't last very long. I must have eaten half of them during those 10 minutes and I have plenty of shots where tiny fingers are trying to steal them off this plate!  Do try these crispy munchies. They are so perfect for a party. Go ahead, make 'em!


Crispy Onion Rings
(Printable Recipe)

Prep time: 20 mins | Frying time: 15mins | Servings 3-4

Ingredients:
  • 2-3 large white or yellow onions * see notes
  • oil for deep frying
  • salt to taste (fine tablesalt to sprinkle)
For the coating:
  • 1/2 cup all purpose flour (maida)
  • 1/4 cup cornstarch (cornflour)
  • 2 tablespoons instant mashed potato powder * see notes
  • 1 cup of cold club soda
  • a pinch of cayenne or regular red chilli powder
  • 2-3 cups Panko breadcrumbs, or as required * see notes
Method:
1. Peel the onions and cut them into slices about 1/4 of an inch (not too thick or they won't cook). Separate the rings and keep aside. Place the Panko crumbs on a shallow plate.
2. Heat oil (on a medium high - not full flame) in a deep frying pan and keep it ready.
3. In a large bowl add all the dry ingredients - maida, cornflour, mashed potato powder & cayenne/chilli powder and whisk them all together.
4. Add the club soda and continue to whisk the batter. It may seem a little runny at first but the mashed potato powder will help thicken it up quickly.
5. Add a few onion rings into the prepared batter and flip them over using a fork until they are well coated.
6. Next, coat the rings with the Panko crumbs using a separate fork (to avoid a sticky mess in the crumbs!)
7. Gently slip the onion rings, a few at a time (do not overcrowd the pan) into the hot oil and let it fry on both sides till the colour turns into a golden brown.
8. Use a slotted spoon or fork to remove them onto an absorbent kitchen tissue. They will turn really crisp and hard upon cooling.
9. Sprinkle lightly with salt before serving. Enjoy!

Notes:
1. If you can't find white or yellow onions you can substitute them with very large red/pink onions that we commonly find in India.
2. Instant mashed potato powder is available at well stocked supermarkets across India. When in Mumbai I had purchased it (a brand called Vegit, Aloo Mash) from Star Bazar. It is usually found in the aisle that stocks up instant foods such as idlis, gulab jamoons etc.
3. Panko breadcrumbs are a Japanese brand of breadcrumbs that turns a beautiful golden when fried. It is available at gourmet stores such as Godrej Nature's Basket in Mumbai. In Dubai you can find Panko at Spinney's

Beetroot Halwa ~ Easy, Pressure Cooker Method

$
0
0


This Independence Day I have no Tri Colour dish to post. Instead I picked a very simple sweet dish made out of beets. This beetroot halwa is a cousin of  the very popular carrot halwa or gajar ka halwa as we call it in Hindi. I had written about my low haemoglobin count and how I was trying to get it to normal levels. I read up a lot about how beets are simply magical to produce good blood in your system. Despite know about its health benefits we aren't so keen to eat beets cooked in anyway so there were plenty of times that they would hang around the fridge for days before they eventually got chucked into the bin (don't gasp, it's true). I finally decided I must put an end to that wasteful trend and went ahead and grated them up to be made into a nice halwa. 

This recipe is super easy. I adapted my own carrot halwa recipe and decided to pressure cook the beets as I wanted to speed up the cooking process. The resultant halwa was a perfectly cooked sweet dish with its nutrients intact (or so I'd like to believe) as pressure cooking is known to retain the nutritional value of food unlike the traditional stove top method where you cook the halwa over a slow heat for hours. The best part of pressure cooking is that it is a huge time saver and also lets you be distracted and multi task. While the beets cooked I cleared up the kitchen and what not (this includes shooing away husband who popped his head a hundred times to check if the halwa was done)


Now, a slightly dramatic reason why I chose the beetroot halwa to be posted on the special occasion of India's 67th Independence Day is because of its colour. The beets represent the colour of blood - something that runs freely in all of us despite our cast, creed, social and economic standing. Despite 'blood' being the common denominator for all of us we as a nation are divided for several reasons. I won't elaborate and make this a depressing post. But I just hope we all remember that we are all the same at the end of the day so it's about time we ditched the animosity and worked towards creating a better nation, a safer place for our people.

Happy Independence Day!


Beetroot Halwa
(Printable Recipe)

Prep time: 15 mins | Cook time: 25 mins | Serves 4
  • 2 firmly packed cups of raw, grated beetroot (approx 4 small-medium sized beetroots washed, peeled & grated)
  • 180 grams (2 tiny tins) sweetened condensed milk
  • 3 tablespoons sugar (optional - for additional sweetness, adjust to taste)
  • 1-1/2 cups milk (or 3/4th cup milk+3/4th cup water)
  • 3 pods of cardamom powdered
  • 1 tablespoon raisins
  • 2 tablespoons mixed nuts (cashew nut halves, almond slivers, chopped pistachios)
  • 2 tablespoons ghee
Method:
1. Transfer the grated beetroot into the pressure cooker and add the milk (or the milk and water mixture), stir to combine and close the lid. Place the weight (whistle) and cook on a full flame until 2 whistles go off. Remove from heat and let the pressure cooker cool down to room temperature
2. When the weight loosens up, open the lid, stir the contents and if there is still a lot of liquid it it, place the cooker back on a low heat for the beets to cook again. Let the halwa simmer until the excess liquid evaporates and the beetroot is well cooked and the halwa thickens up. This should take about 10-12 minutes
3. Add the condensed milk and give it a good mix. Continue to simmer for another 3-4 minutes making sure to stir in between so that the halwa doesn't stick to the bottom of the pan. Check the taste and add the additional sugar only if required. (see notes)
4. While the halwa is simmering in another smaller pan heat the ghee. When it is hot (but not smoking) add the raisins and fry them till they puff up - remove quickly before they burn. In the same ghee add the mixed nuts and fry till they turn pale golden. Remove and keep aside.
5. Add the fried raisins, nuts and the powdered cardamom to the halwa. Mix once and

Notes:
If you don't have a pressure cooker you can cook this in a regular pan (wide based, such as a kadhai/wok). It will take you longer though and will need you to be present to keep checking, stirring the contents. However, halwas made over a slow fire over a longer period of time are deemed more tasty.
When the beetroots are initially placed in the cooker you may add just about 1/2 a pinch of salt. The addition of salt helps to bring out the flavours more prominently.
Remember that beetroots may not be very sweet so you may need to add the sugar, however do not add the sugar when the halwa is piping hot - when the food is hot the taste buds are deceived into thinking that the sugar is less. Take a small amount of halwa and when it is cool enough, taste it and then add the additional sugar if required.

Cinnamon Coffee Rolls

$
0
0

Every once in a while you come across a recipe that simply urges you to try it right away and impresses you beyond your expectations. Well, this is one such recipe. I have been so apprehensive about trying out any kind of breads. I have over the past two years tried my hand at several types of breads and none of them have impressed me. A few flops later I vowed never to try my hand at breads ever again. This despite the fact that the whole purpose of buying a big oven after we moved to this place was to be able to make all kinds of breads like the baguette for example. The husband has been yearning for breads actually. So much that we picked a book on breads on our recent trip to Mangalore. Along with this book I had also bought a tiny book called Coffee, 100 Everyday Recipes. the Everyday Recipes series is my favourite and I have several other books from which I have tried numerous recipes. 

I am a happy person when recipes keep their promise. I mean who wants a waste of ingredients, time and patience right? I was particularly keen to try out this recipe from the book and I had a gut feeling that it would not flop. And it didn't! Infact, I was pretty pleased with the way the sticky flour mixture was magically turning into a smooth dough and then the joy of seeing it double is something else! The joy of playing around with yeast I must say. 


Very rarely do I cook and blog on the same day as it involves many lengthy processes which can be very tiring for a mother of two. From measuring out the ingredients to baking, plating, styling, clicking, writing and editing its a whole gamut of things. But then there are those gems which must be shared on the same day. I bombarded my bunch of friends on whatsapp with the before and after pictures of these rolls and loved the oohs and aahs that I got showered with.


The best part about baking bread is watching the 'science' transform itself into something so poetic. Poetry and romance that is so edible. I know this sounds like nonsense :-) but I think you must start baking breads to fall in love with it. I have been bitten and smitten by the love bug for sure and I am not stopping at this. From now on I will try my hand at making at least one bread recipe once a week. There is so much out there to learn and life's too short.


So here you go, very soft and delicious cinnamon pull apart rolls...if you don't like cinnamon feel free to skip it or replace it with (very little) nutmeg or mixed spice powder. If you are a lover of strong coffee, add a little extra coffee. If you want to make this for kids then go right ahead and skip the coffee and sugar. Infact replace the filling with Nutella or any other nut butter of your choice. I am yet to try out a savoury version of this. Will let you know how it turns out. For now...here goes! Enjoy


Cinnamon Coffee Rolls

Prep time: 3 hours approx | Baking time: 18-20 mins |  Yield: 9 big pull apart rolls

Ingredients:

For the rolls:
  • 450 grams / 1 lb all purpose flour (maida) plus extra for dusting
  • 1/4 teaspoon salt
  • 1-1/2 teaspoons easy-blend dried yeast (I used DCL instant dried yeast) * see notes
  • 40 grams/ 1-1/2 oz caster sugar
  • 55 grams / 2 oz butter, melted, plus extra for greasing
  • 1 egg lightly beaten
  • 200 ml / 7 fl oz lukewarm milk
  • oil for greasing
  • 115 grams / 4 oz icing sugar mixed with 3-4 teaspoons water to make a smooth icing paste * see notes
For the filling:
  • 40 grams / 1-1/2 oz butter, softened at room temperature
  • 50 grams / 1-3/4 oz soft dark brown sugar
  • 1-1/2 teaspoon instant coffee powder (if you are using large granules, powder them)
  • 1/2-3/4th teaspoon cinnamon powder *see notes before you proceed
Method:
1. Sift the flour and salt into a large bowl. Stir in the yeast and caster sugar and make a well in the centre
2. Beat the egg, butter and milk together in a jug or bowl and pour this mixture into the well and mix to make a smooth dough.
3. Sprinkle flour on a clean working surface/kitchen counter and tip the dough over it. Knead using the heel of your palm for 5-6 minutes until it turns nice and elastic. While kneading stretch the dough against the surface - this helps it turn elastic. Dust with extra flour if the dough seems too sticky and knead it into a smooth ball.
4. Place the ball of dough in a lightly oiled large bowl. Cover with a lightly oiled cling film (plastic wrap). Keep in a warm place for about 1-1/2 hours or till the dough doubles in size.
5. Grease a 9 inch square pan with butter. To prepare the filling, mix the brown sugar, instant coffee powder and cinnamon in a bowl. Keep the softened butter ready in another bowl
6. When the dough has doubled in size tip it onto a floured surface and lightly knead it for a minute. Roll out into a 30 cm/12 inch square. Make sure the surface of the rolled out square is even. It doesn't have to be a perfect square.
7. Now spread the softened butter evenly over the surface of the rolled out dough. Scatter/sprinkle the sugar+coffee+cinnamon mixture over it to cover the entire surface.
8. Now starting from the side opposite to you roll the dough firmly into a log. Using a sharp knife cut the log into 9 equal pieces.
9. Place the pieces, cut side facing upwards into the greased baking pan. Leave spaces around each roll as they will double in size.
10. Cover the pan with a lightly oiled cling film and place it in a warm place again till it doubles in size about 35-40 minutes.
12. When the rolls have doubled up, preheat the oven at 200 degrees C and bake for 18-20 minutes or until risen and golden.
13. Once out of the oven brush the rolls lightly with milk so that they don't turn very crusty and hard upon cooling. Place the pan to cool outside for 10 mins and then invert onto a wire rack.
14. When the rolls are still warm drizzle the icing sugar glaze over them.
15. Pull apart to serve. They taste great with coffee, milk or just as they are!

Notes:
1. Instant dried yeast does not require activation in warm water unlike regular active dried yeast. Instant yeast is available in small sachets. I bought my stock from Lulu Hypermarket.
2. Since I didn't want very sweet rolls I reduced the icing by half the quantity. If you like mildly sweet rolls use just 50-55 grams of icing sugar and 1-2 teaspoons of water to make a paste. If you like the rolls sweeter you can make extra paste again after tasting a roll.
3. The recipe called for 1 teaspoon cinnamon powder, instead, I substituted it with 1 teaspoon unsweetened cocoa powder (to give that extra colour to the filling) and just a big pinch of cinnamon powder as my family doesn't like the aroma of strong cinnamon. If you like, substitute the cinnamon with a little nutmeg but not too much.

Mithache Ghare | Kolache Ghare | Tender Jackfruit in Brine (Salted Raw Jackfruit)

$
0
0

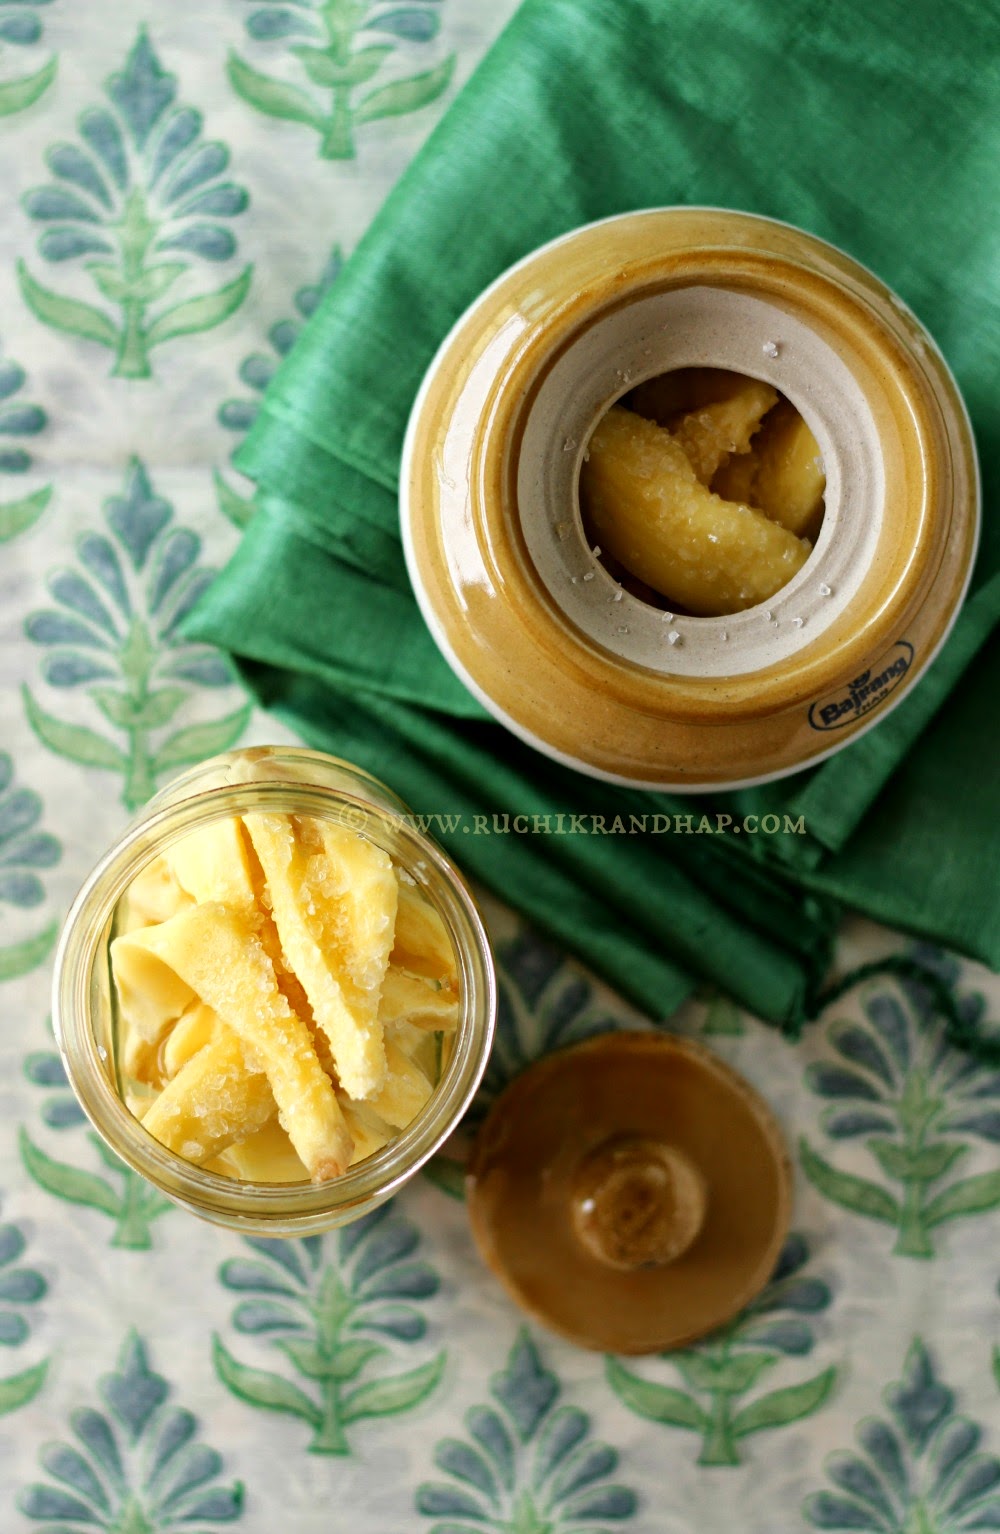
Thanks to blogging I have been reintroduced to many Mangalorean classic recipes that were not frequently prepared at my place. On my recent trip to Mangalore the season was just right for us to enjoy a few of the abundant dishes that are prepared out of raw and ripe jackfruits. My mum-in-law was very enthusiastic to teach me to prepare the 'happoL' (papad/poppadoms) but to our bad luck within a week of our arrival in Mangalore it started to pour non stop and our 'happoL' fiasco died an early death. These papads made out of tender but not ripe jackfruit (the pods need to be formed completely) are called as 'ponsache happoL' that require very good sunshine as it aids proper drying and subsequent storage for upto 1 year without spoiling. Anyway, I am glad that I got to see the process and perhaps if I go to Mangalore during the summer next year I could try my hand at preparing some again. 


Like the coconut tree and its fruit the jackfruit tree also has plenty of uses. From the wood that is used to prepare furniture and beams to support traditional tile houses in Mangalore to the leaves that are used in the preparation of leaf baskets/moulds to prepare traditional rice breads called the 'kottige/Kotto' or 'Itoo'. The fruit is used at all stages of ripening. At the very beginning of its life, when the jackfruit is extremely tender and small in size it is called as the 'khadgi' and is used in the preparation of sukkha (shredded and sauteed with spices and coconut) or sliced up and marinated with salt & chilli paste (meet -mirsaang) to be shallow or deep fried. Some people even prepare a mock meat biryani out of it and it is famously known as 'Kathal-ki Biryani' in Hindi. 


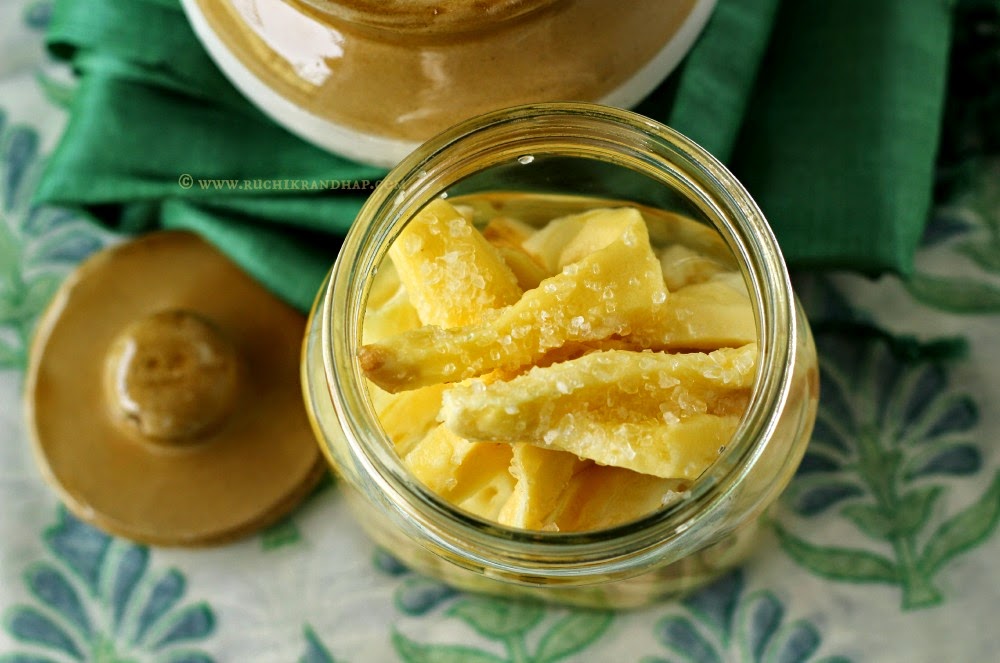
At a stage where the pods have formed but the jack has not yet reached its fully ripened stage the pale/off white fruit is removed to be preserved for a longer period of time by rubbing sea salt over it and storing it in traditional ceramic jars known as the 'buyaon' in Konkani. This tender jackfruit is then used up as required especially during the monsoon when seafood is not available in abundance or is extremely expensive. One can prepare many dishes out of salted jackfruit and today's post is a little about how the pods are salted and preserved.


It was literally my first experience at salting the jackfruit. Unfortunately I was unable to take the step by step pictures of this entire process. I brought back some with me when I returned and I am simply relishing it now. However, too much of salted/pickled foods is not good for people with high blood pressure problems, so do eat it in moderation.


Mithache Ghare | Kolache Ghare | Tender Jackfruit in Brine (Salted Raw Jackfruit)


Ingredients:
  • 1 medium sized raw jackfruit
  • 2-3 cups rock salt/sea salt
Other Things You Need:
  • sickle (koithi) or large sharp knife
  • plenty of old newspapers & clean, old kitchen towels (to be discarded after use)
  • coconut or any other oil (to grease the palms)
  • Large steel/plastic bowls/pans/vessels to hold the jackfruit and the discarded pith & skin.
  • large ceramic (buyaon/bharani) or glass jar
Method:
Cleaning the jackfruit
1. Spread out newspapers on the floor to help avoid a sticky mess - jackfruit sap is a pain to clean up.
2. Apply oil generously on the blade of the sickle or knife - let the oil not touch the handle or else it will slip. The application of oil will help clean up of the tools used to cut the fruit.
3. Cut open the jackfruit right in the centre and quickly wipe off the fresh white sticky sap that oozes using slightly oiled kitchen tissue or a old clean kitchen towel. Next, cut the halves into two again and maybe smaller halves if the jackfruit is too large. These chunks are called as 'shed' in Konkani.
4. Carefully slice off the core from each chunk. The core is the hard white portion at the top of each chunk.
5. Pluck out the jackfruit pods carefully - you will need to remove the white thin strips of pith (membranes) that surround each pale yellow pod. Discard the white pith.
6. Each yellow pod of fruit will have a seed within called as 'bikan' in Konkani. Carefully open the pods and separate the seeds. Retain the seeds for later use.
7. When all the jackfruit pods have been removed discard the skin along with the pith.

Preserving the jackfruit
1. Slit the deseeded jackfruit pods into thick strips. Toss them into the ceramic jar and add the salt - enough to coat all the strips well with salt. There is no need to add water. Cover the jar and keep in a clean, dry place of your kitchen.
2. In a couple of days, the entire volume of jackfruit strips would have reduced and the excess water from the jackfruit oozes out causing the strips the be covered in its own salt water or brine as it is called.
3. You can transfer the strips in smaller glass bottles and refrigerate if you wish. Make sure that the bottles have enough brine in them - enough to cover all jackfruit strips completely.

To Use:
Whenever you wish to cook the jackfruit pieces remove the required quantity and soak them in fresh water for a few hours. After a couple of changes of water it is ready to cook.
See my upcoming recipes for the same.

Notes:
The process of cleaning a ripe jackfruit is the same. If you wish to freeze the jackfruit pods make sure the seeds are removed before storing the fruit in ziplock/airtight freezer safe containers.

Tropical Coconut Muffins

$
0
0

Most of my baking adventures happen on days when I have plenty of other things to do but when the baking bug bites me I simply sideline the rest just to satiate my hunger for baking. Since the little one now is showing her true colours and stepping into her terrible twos it is hard to finish baking in one go with an eternally clingy little monkey. Although I don't do any meticulous planning before baking (most of my baking happens on a whim) I phase out the whole program over a period of hours. If the bug bites me in the morning I try to complete my cooking first and parallely keep the eggs and butter out of the fridge. Next, I go about measuring the ingredients and placing them in different bowls and plonk them on my work table in the kitchen. We have a little foldable table that we picked up from IKEA for this very purpose. It springs into action only when required (a.k.a when the rest of the counter tops and workplaces are overburdened with random clutter) and gets shooed away when not in use. 


Although the whole programme sounds tedious (I mean, I never ever considered measuring out ingredients into bowls earlier) it does save a lot of time. When everything is ready all I have to do is mix the batter and pop the tins into the oven. This whole job hardly takes 10 mins and then the oven takes over. There are days when I even measure out ingredients the previous night I am good to go in the morning or whenever I am free to bake. Hey, lest you think I am hyper organized, I am NOT! I just like to do whatever it takes to make sure I get my healthy dose of baking every so often. I go insane otherwise. Those who have a baking obsession will empathise with me.


What I also like to do is bake with ingredients at hand, so I usually bookmark recipes that call for oil instead of butter or make use of some or the other ingredient that is hanging around in my pantry and needs to be used before expiry. Can you guess what that one ingredient is that usually finds itself in my fridge half used? For the number of times that I prepare pineapple sheera it has to be canned pineapple! Well, I always seem to have a few extra slices of pineapple which are too less a quantity to be used for another batch of sheera. These slices cannot be left in the can for too long so I was desperately hunting for recipes to use them up. I chanced upon this recipe in my favourite little book on baking, Everyday Muffins & Bakes from which I have tried the Welsh cakes, Mocha Brownies, Mincemeat Crumble Bars & Rose Petal Cupcakes. As expected the recipe didn't disappoint me. Not only were the pineapple slices put to good use but also the dessicated coconut that was leftover from the Choco Coconut Laddoos I tried last Deepavali.


When the muffins were baking the whole house was filled with the awesome aroma of toasted coconut. It filled me with such a warm feeling and it was wonderful to bite into these delicious muffins as soon as they cooled down a bit. It was truly a tropical fest what with the coconut, pineapple and banana that add a new dimension to muffins that would have otherwise been just plain and boring. These delicious muffins however are pretty heavy if you ask me - they fill you up easily and you may not go beyond one or two muffins at the most. This also is reason enough to serve them as lunch box goodies to your lil one. If he is a fussy eater and doesn't enjoy eating fruits by themselves he is sure to like this (hopefully!). Do consider serving them as an interesting breakfast option as these muffins are not very sweet. They make an ideal grab and go kind of a breakfast. I hope you enjoy them!


Love to bake? Do check out my recipe index on cakes & bakes

Tropical Coconut Muffins

Prep time: 15 mins | Bake time: 20 mins | Yield 14-15 muffins

Ingredients:
  • 250 grams / 9 oz all purpose flour (maida)
  • 1 teaspoon baking powder
  • 1 teaspoon soda bi carb / baking soda
  • 1/2 teaspoon allspice powder * see notes
  • 115 grams / 4 oz butter
  • 225 grams / 9 oz brown sugar (I used muscovado)
  • 2 large eggs, lightly beaten
  • 2 tablespoons thick yogurt/curds - natural, pineapple or banana flavoured
  • 1 tablespoon rum (skip if you wish)
  • 1 ripe banana, sliced (I used 2-3 tiny Elaichi/Kadholi bananas)
  • 75 grams / 2-3/4th oz canned pineapple rings, drained and chopped
  • 55 grams / 2 oz dessicated coconut
For the topping:
  • 4 tablespoons raw sugar (I used demerara)
  • 1 teaspoon allspice 
  • 25 grams / 1 oz dessicated coconut
Method:
1. Line a 12 cup muffin pan with cupcake liners. Sift the dry ingredients (flour, baking powder, baking soda and allspice) into a mixing bowl. Preheat the oven at 200 degrees C.
2. In another bowl cream together the butter and brown sugar. Add the lightly beaten eggs, mix in the yogurt and rum (if using)
3. Add the banana, pineapple and dessicated coconut and mix gently. Add this mixture into the bowl of sifted flour and other dry ingredients. Do not overstir the mixture - just mix till combined. It is ok if the batter seems a little lumpy.
4. Use a tablespoon to fill up the cupcake liners upto 2/3rds full with the prepared batter.
6. Mix together the raw sugar and allspice and sprinkle it over the muffins. Next, sprinkle the dessicated coconut and transfer to the preheated oven and bake for about 20 minutes or till the muffins have risen and turned golden and the skewer inserted comes out clean.
7. Remove the pan and allow to cool outside for 10 mins. Transfer the muffins onto a wire rack and let it cool down a bit before serving.

Notes:
1. Allspice is the name of a kind of a warm spice like cinnamon or clove. It has a unique aroma of all spices and hence the name. Allspice plants are common down South India especially Mangalore and Kerala. Allspice should not be confused for garam masala which is a blend of different spices ground and mixed together. If you do not have allspice, substitute with equal quantity of cinnamon or just about 1/8th teaspoon of nutmeg powder. You may skip it altogether.

Like this post? Click to stay connected!

Follow me on FacebookFollow me on TwitterSubscribe via RssGoogle+Follow Me on Pinterest

Kaju Badam Milk Powder (Cashew Nut & Almond Health Drink Mix)

$
0
0

Now that schools have started the mommy in me is working overtime trying to chalk out meal plans and ensure that the son gets decent meals that help his weight gain. Well, sorry to bore you with the same old stories, but my life is pretty much bound by the school routine during the academic year and all I can think of is how to sustain my little one during the long hours at school. That's how life is for moms across the world I guess (although I swear it was a lot easier in India as the school timings were more relaxed and travel time didn't eat up his playtime). So all I do now is wake up at an unearthly hour, pack the lunch box, fix breakfast, feed and pack the child off to school and worry about what to make for the next day. Well, planning meals ahead of time happens most of the time but not always. I mean, I am not a super woman and I do like to laze around the day sometimes and in the bargain my son has to settle for a cheese sandwich the next day, something I can slap together in 2 seconds. 


But then sometimes the goddess in me rises above the mundane and wants to do something spectacular, like make healthy meals and get the laundry sorted and declutter everything in sight and bake and prepare condiments or put some make-ahead meals together - basically, the works.  This goddess pops up in my head just once a year - thank god for that! Anyway, one of the things I did once upon a time was to scout for a healthy beverage mix for my son since the only thing he really loves to drink is coffee and I couldn't possibly indulge him everyday. When the ads on the telly lure him you can find some random tins of health drinks on my pantry shelf. But after a while he loses interest in them and says they taste no good anymore so I am stuck with a few tins of Pediasure or Ovaltine or Bournvita. The scouting resulted in a good recipe I wanted to try for long. I bought packets of cashew nuts and almonds but ended up eating them because I just didn't have the time to roast and powder them. I eventually gave it a try and it was ridiculously easy. I wondered why I didn't make it before.

This recipe is a super easy way to get some goodness of nuts into your body without munching them. It's a cheat's way of making nut milk but of course it is not vegan. The rock sugar (also known as rock candy) is believed to be beneficial to ward off colds and bring out the phlegm when you have it. Saffron is a wonder spice that is known to have a host of health benefits ranging from anti oxidant properties to those that treat a mild depression, promote sleep. 

This recipe was given to me by Mrs. Asha Sathish Phillar on one of the food groups on Facebook. Thank you Asha Aunty!  


Kaju Badam Milk Powder

Prep time: 20 mins | Cook time: Nil | Yield: approx 250 grams

Ingredients:
  • 1/2 cup cashew nuts 
  • 1/2 cup almonds with peel
  • 1 cup rock sugar / kadishakker / misri / koday sakker
  • a few strands of saffron
Method:
1. Heat a heavy based skillet/tawa and dry roast the nuts one by one - just until you get a nice aroma. Do not burn them. Transfer them to a plate to cool completely.
2. Pulse the nuts, rock sugar and the saffron in the dry grinding jar of your mixer. Don't grind it on low speed, instead use the pulse option to powder it. You need to be careful here as the mixture can turn into a thick paste before you know it.
3. Transfer the contents into a clean, dry airtight container/jar. Store it in the fridge for a longer shelf life
4. Add 1 teaspoon of this mixture to 1 cup of hot or chilled milk and enjoy!

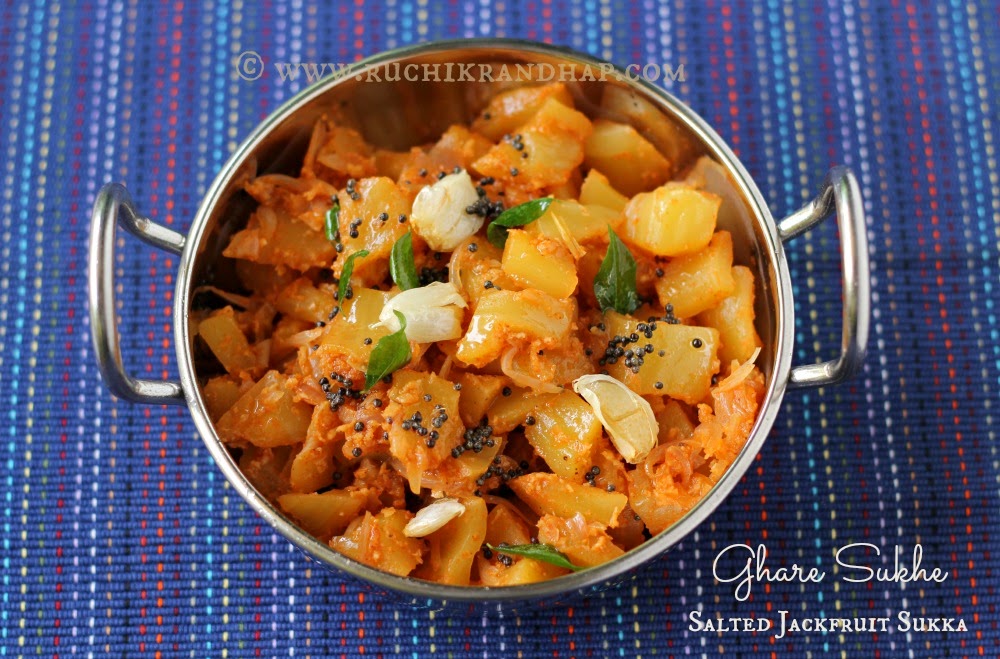
Ghare Sukhe | Uppad Pachir Aajadina / Salla Upkari (Salted Jackfruit Sukka)

$
0
0

When I called mum today she gave me the weather update - "Shirandariso paus yetha anga, boro kalok zala (it's raining cats and dogs here and its really gloomy and dark)". Well, a typical day during the monsoons in Mangalore. On such days everyone likes to dig into some kind of comfort food. While I am thoroughly missing the monsoons (really enjoyed them while I was there in July) I did manage to bring back some tangible memories with me - salted tender jackfruit that my mother in law and I had prepared together. So the last few days saw me preparing two variations of how these chunks could be cooked. The first one is where we make a 'sukka' or saute of the tender jackfruit with basic spices and loads of coconut. Dishes made the 'sukka' way are called as 'sukhe' in Konkani. This is like a very basic dish which you can put together in no time. We Mangaloreans make plenty of sukka variations with vegetables and even meat. Sonay sukhe (garbanzo beans sukka), clam sukka, chicken sukka and beef sukka are probably the most famous dishes on the menu at our place. 
Now another sukka preparation is added to my repertoire. We thoroughly enjoyed this dish along with some simple Mangalorean style daaliso saar and piping hot red rice. I hope you enjoy it too!


Ghare Sukhe | Uppad Pachir Aajadina / Salla Upkari (Salted Jackfruit Sukka)

Prep time: 6-12 hours (for soaking) + 15 mins | Cook time: 10-15 mins | Serves 2-3

Ingredients:
  • 2 cups salted jackfruit, chopped
  • 1 small onion finely sliced
  • 1-1/2 level teaspoons bafad powder * see notes
  • 1/2 cup water
  • 2-3 jackfruit seeds/bikna chopped (optional)
  • 2 tablespoons grated coconut
For the tempering:
  • 1 tablespoon oil
  • 1/2 teaspoon mustard
  • 3-4 small flakes of garlic, crushed
  • 5-6 curry leaves
Method:
1. Before you cook the salted jackfruit it needs to be soaked in a lot of water for a few hours. The soaking time varies according to the age of the jackfruit in brine (salt water). I soaked the jackfruit that was in brine for 1 month for about 10-12 hours. To cut down this time change the water multiple times. 
2. Once the jackfruit is rinsed, chop it into bite sized pieces and transfer into a pressure cooker. Add the sliced onion, bafad powder and water (1/2 cup approx). Cover the lid, place the weight (whistle) and pressure cook on a full heat till the cooker begins to hiss. This happens just before the whistle goes off. Remove from heat. We don't want to overcook the jackfruit. (* see notes)
3. Let the cooker cool down a little until the whistle comes off easily. Open and give it a stir. Add the grated coconut and mix well. 
4. To prepare the tempering, heat oil in a small pan and when hot add the mustard seeds. When they stop spluttering add the crushed garlic and toss them about till they turn golden. Add the curry leaves and remove from heat.
5. Pour the tempering over the prepared jackfruit sukka. Cover the pan immediately to retain the aroma.
6. Serve hot with piping hot rice and curry of your choice.

Notes:
1. Instead of bafad powder you may use any spice blend that has at least red chillies, cumin and coriander. To make your own bafad powder, see the recipe here or make it for one time use. Use a blend of red chilli powder (abt 1 tsp)+ coriander powder (3/4th tsp) + 2 pinches each of cumin powder, pepper powder & turmeric powder
2. If you are unable to stop the pressure cooker from releasing the whistle place the cooker under a tap of water for a few seconds and slowly release the whistle when it begins to loosen up.

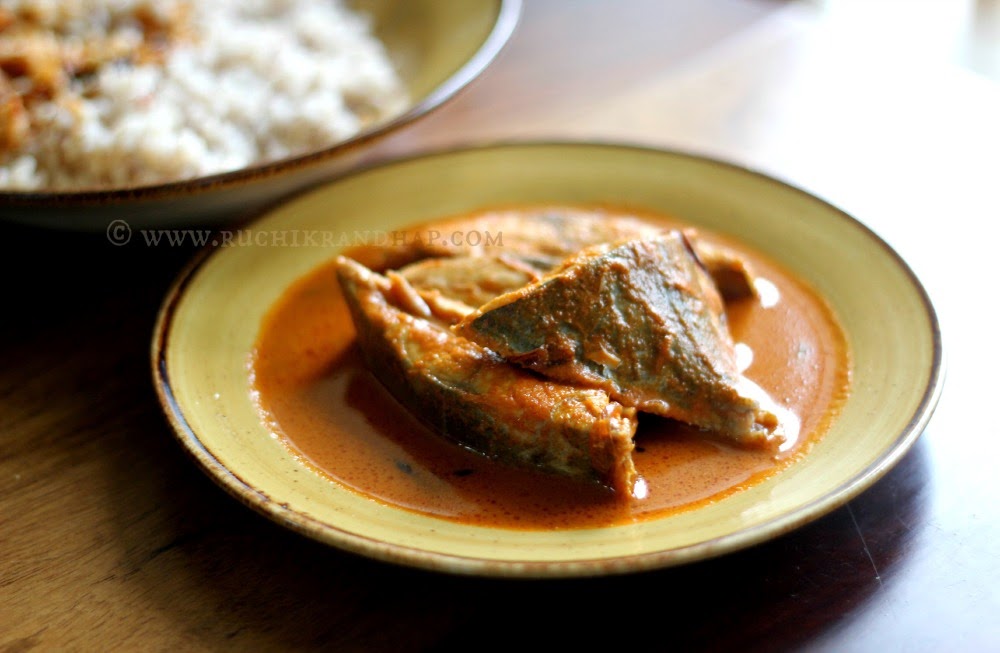
Maslyechi Jeere Miri Kadi - Cumin & Pepper Style Fish Curry

$
0
0

One of my favourite Mangalorean style fish curries is this simple cumin & pepper style curry. Well, although it says cumin & pepper the list of ingredients is not limited to just these two. It would be virtually impossible to dunk the fish pieces in a curry made of barely 2-3 ingredients but among the various types of fish curries we make back home is this style which is prepared for a particular kinds of fish. Most times we prepare the coconut curry where we use copious amounts of freshly grated coconut as the key ingredient in the preparation. The coconut curry is an easy way to make fish curry with virtually any kind of fish available on hand but then our ancestors were wise. They, from various trials & errors have devised ways to cook different varieties of fish, thrown together different blends of ingredients to compliment the nature of the fish being cooked enabling the flavours to complement each other thus making the meal experience a wholesome and enjoyable one. 


Most women from previous generations never required a book to note down the recipes. They always knew what kind of curry went well with what kind of fish but since my memory fails me I always prefer to jot it down (you see, this is also the main reason behind the creation of the blog). People like my mum and mum-in-law can instantly tell me what curry I can put together in the shortest possible time for the day's catch. If you see my recipe index for seafood I have made an attempt to record just this. However, since I am not so good at experimenting with seafood I waited for my trip to Mangalore to learn some fish curries from my mum-in-law. Another one of her masterpieces is this beautiful, flavourful and spicy fish curry.


As I have mentioned in my previous posts the peppercorn is one of Mangalore's prized crops. My mum-in-law loves to use it in her curries and trust me there is nothing more aromatic than the aroma of freshly ground peppercorn - just make sure you don't take a deep whiff of it or you are done for! Since the past few years I get my annual quota of fresh peppercorns from my mum-in-law's garden and I love using my peppermill to grind it instantly - the taste and aroma can activate every taste bud that had previously died due to an overdose of placid, bland food. 


This delicious curry was prepared by my mum-in-law with some enthusiastic assistance from me. I never got the chance to try it out in my kitchen here in Dubai as my son simply refuses to eat fish - so we are ovo vegetarians or chickiterians (if there is such a word) most of the week. 

We enjoyed this curry so much with some freshly prepared, piping hot boiled rice as you can see in the pictures. Life is good!


Maslyechi Jeere Miri Kadi - Cumin & Pepper Style Fish Curry


Ingredients:
  • 1/2 kg black pomfret/lady fish (kane)/shark (thato)/ silver fish/whiting (erli), ray fish/kite fish(vagole)*see notes
  • salt to taste
  • oil for frying
  • 1/2 a medium sized onion finely sliced (for tempering)
For the masala:
  • 5-6 long red chillies (bedgi) (use deseeded if you wish to tone down the spice)
  • 1 teaspoon coriander seeds * see notes
  • 2 teaspoons cumin
  • 1/2 teaspoon peppercorns
  • 1/4 teaspoon turmeric powder
  • 2 medium sized onions
  • 7-8 small cloves of garlic
  • 2 marble sized ball of tamarind
  • 1/2 teaspoon mustard (optional)
  • 2 tablespoons grated coconut
Method:
1. Descale and clean the fish (if not cleaned already). Wash in a 3-4 changes of water. Allow to drain on a colander. If desired marinate the fish lightly with salt.
2. Grind all the ingredients mentioned under 'For the Masala'. Reserve the masala water from the mixie.
3. In a pan/kadhai heat some oil and fry the ground masala well. Add the reserved masala water and a little additional water to make a gravy of medium thickness (don't make it too watery as the fish tends to release some stock making the gravy too thin eventually). Let the gravy come to a boil.
4. Reduce the heat to medium low and add the fish pieces gently.

Notes:
1. Adjust the number of chillies to your choice. Fish like black pomfret or shark taste nice with a slightly higher level of spice, but do adjust it as per your level of spice tolerance. If you are using lady fish (kane) reduce the spice slightly.
2. The use of coriander is not typical - it is optional and doesn't make much difference if you add or omit it.
3. If you are using fish such as ray fish (vagole), shark (thato) or sole fish (lepo) temper it with 2-3 cloves of garlic instead of onion.
4. If you are using frozen fish make sure that the fish is at room temperature before cooking - you need to thaw it over several hours. If you force defrost it (using the defrost option in your microwave or shock the fish by placing it in water) it will continue to ooze out water in the curry making your end result very watery. The best way to defrost fish is to place it from the freezer into your fridge the previous night (if you are planning to cook it for the next day's lunch) and then from the fridge to your kitchen counter in the morning.

Simple Badami Chicken ~ Chicken in Almond Sauce

$
0
0

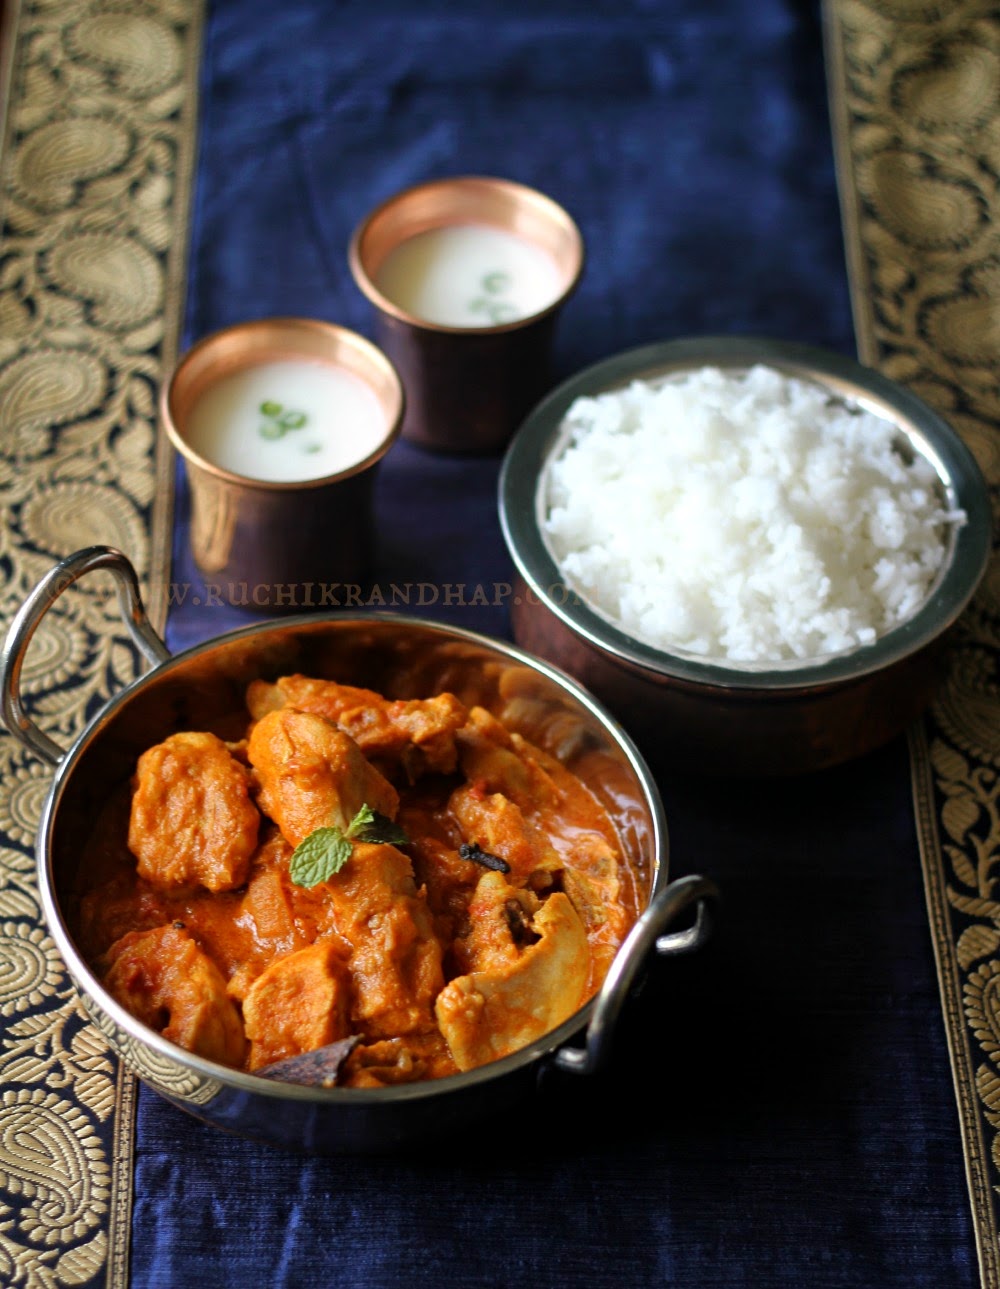
Our weekend meals are usually elaborate, experimental dishes. However, yesterday I chose to prepare chicken so that we could enjoy some leftovers today as I had to take the kids for a musical concert in the morning and knew I'd barely have any time to finish the cooking and clean up the kitchen before leaving. I flipped through a few books and checked my list of bookmarked recipes on the kitchen pin up board. I had finished making almost everything I had bookmarked since ages save for a kebab recipe. I then grabbed my favourite book by B.F Varghese and narrowed down on this recipe which she named the Rajput Chicken Curry. I cross checked on google for a similar recipe but couldn't find any by the same name. On the contrary I found many recipes with more or less the same ingredients named as Badami chicken or chicken in almond sauce although those recipes were more elaborate and extragavant.

I really didn't have the time to gather all those ingredients and kill myself in the kitchen especially on a school day. My son was expected home in a couple of hours and I had little time to finalise and set off to cook. Since he totally loves North Indian style chicken curries I decided to try my hand at this simple version of Badami chicken. The prepping didn't take a lot of time and its one of those dishes that don't demand your complete attention. I set about attending to other chores when the chicken was cooking. So it's totally my kind of curry. 


However, when the time came for me to do the photo shoot I was in for a big disappointment. My camera is on the verge of dying and I am not sure how much more time before it gives up completely. I barely managed to grab a few shots before it died down. While I decide what to do with it I think I will keep the blog alive with some recipes which have not yet been published because I wasn't completely happy with the pictures and was intending to do a re shoot. However, I don't think I'll have that privilege for a long time and so I'll just go with the flow and post stuff that deserves to be on the blog but hasn't yet been given that chance.


Simple Badami Chicken ~ Chicken in Almond Sauce

Prep time: 20 mins | Cook time: 20 mins | Serves 4-5

Ingredients:
  • 1 kg chicken, cleaned and cut into medium sized pieces (use boneless chicken if you wish)
  • 2 cups finely chopped onions (approx 2 medium-big ones)
  • 1 cup finely chopped tomatoes (approx 1 large)
  • 1/2 cup thick curds/yogurt, whisked
  • 4 cardamoms, slightly bruised
  • 2 inch stick of cinnamon or cassia bark
  • 4 cloves
  • oil for shallow frying
  • salt to taste
To be ground:
  • 20 almonds or cashew nuts
  • 1-1/2 inches ginger
  • 2 fat cloves of garlic
  • 3 teaspoons plain red chilli powder (adjust to taste) * see notes
  • 1/2 teaspoon turmeric powder
Method:
1. Marinate the cleaned and cut chicken lightly with salt and keep aside.
2. Grind all the ingredients mentioned under 'To be ground' to a fine paste. Tip: Use the smallest jar/dry grinding jar of your mixie to powder the almonds first and then add the rest of the ingredients and a little water to make a smooth paste. Reserve the masala water from the mixie (about 1/2 cup)
3. In a heavy, wide based pan or kadhai heat the oil (on  a medium heat) and toss in the whole spices - cardamoms, cinnamon/cassia bark and cloves. 
4. Add the onions and fry on a medium low heat for a good 5-7 minutes or till they turn translucent/pale and slightly golden. Don't be in a hurry - this step is important to make a good, thick gravy.
5. When the onions have fried add the ground masala paste and the chicken pieces and saute on a medium heat for about 4-5 minutes. Do not add any water. The chicken will release its own juices and help cook it. You can cover the pan and check every now & then to ensure that the masala doesn't get burnt. 
6. Add the tomatoes, mix well and allow to cook until the tomatoes turn mushy and the water has almost dried up.
7. Now add the salt - if you have previously marinated the chicken with salt, skip this step or adjust to taste. Add the whisked yogurt and mix to incorporate. Cover the pan and cook the chicken till it is done and the sauce/gravy has thickened up. 
8. Remove from heat, garnish with chopped coriander (optional) and serve with rice or rotis/chapathis/naan/phulka/dosa

Notes:
Use Kashmiri chilli powder for its great colour but lower spice quotient

Moode | Mooday ~ Rice Cakes Steamed in Screw Pine (Kewra) Leaves

$
0
0

As a South Indian I have had the good fortune of eating many rice breads/cakes and rice based sweetmeats steamed (or pan fried) in various kind of leaves. From sweet dumplings steamed in turmeric leaves to jackfruit pudding steamed in teak leaves I am glad I have eaten them all. Well, almost. I still have one steamed bread to be tried out and I hope I have the chance to do it on my next trip to Mangalore. On my recent trip there I spotted some of these moulds made out of screw pine leaves. Traditionally they are made at home by the Hindu community of Mangalore but nowadays most people prefer to purchase from the market and as such you may find vendors who sell just that - leaf moulds and perhaps homemade coconut leaf brooms to make a few extra bucks. 

A day before Nagara Panchami was celebrated in Mangalore, Roshan & I went hunting for these moulds in the downpour. We must have scanned the whole of Car Street and the flower market before landing up at the doorstep of an old flour mill that had closed down years ago but had comfortably housed the paraphernalia of a man who was busy weaving moulds together. I bought my stuff and jumped into the car quickly before the rains got me and off we came. My mum-in-law checked with her neighbour for the recipe and off we set to prepare the batter. 


We got the batter together and set it aside to be fermented. The next morning the house was filled with the delicious aroma of freshly steamed moode - simple idli batter poured into screw pine leaf moulds. These tall idlis delighted us all, especially my son who enjoyed his breakfast very much. 

Screw pine is also called as kewra in Hindi and is famous for the essence extracted from the flower which looks pretty much like the sitaphal (custard apple). This essence is widely used in Indian cuisine to flavour desserts, drinks and also in the preparation of biryanis (used similar to the rose water, during the layering stage)


I don't recall having eaten a lot of moode (pronounced as mooday) during my childhood as it was seasonal and festive preparation that was rarely prepared by my Hindu neighbours. You see most of such delicacies (moode and kottige) were lovingly shared with us during festivals - a practice that was carried out by my grandmom who would in turn share goodies on a platter during Christmas & New Year. 

I am so glad that for the sake of the blog I managed to find the moulds this time and had the chance to prepare and enjoy them at home, thanks to my mom-in-law and her neighbour!


Moode taste wonderful with any vegetarian or non vegetarian curry of your choice. Traditionally it is eaten with padhengi ghassi (whole moong sprouts cooked in a spicy coconut based gravy) - something I have never tried making at home. We ate the moode for breakfast with some coconut chutney and the leftovers were enjoyed with some piping hot chicken curry with coconut milk. Oh deliciousness! My mouth waters even as I think about it! Can't wait to make and eat them again. Soon!


Moode | Mooday ~ Rice Cakes Steamed in Screw Pine Leaves


Ingredients:
  • 3 cups idli rice (mutambo), parboiled rice
  • 1 cup skinless whole black gram / urad gota
  • 1/2 cup beaten rice (optional) * see notes
  • salt to taste
Other things:
  • 8-10 moode moulds/tubes made out of screw pine/kewra/kedige /pandan leaves
  • tall and deep idli steamer / tondor 
Method:
1. Separately wash and soak the rice and urad in plenty of water for at least 3-4 hours. * see notes
2. After the soaking period is up drain off the water but don't discard it, you can use it to grind the grains.
3. Using the jar meant to grind rice/grains grind the urad first using water sparingly until it turns fluffy and smooth. Transfer this batter into a deep container that is big enough to accomodate batter when it doubles (or triples if the weather is very favourable). * see notes
4. Next, grind the rice using a little water to an almost smooth, thick batter. The batter should have the texture of very fine sand (basically a fine rava texture). Pour the batter into the pan containing the ground urad paste.
5. Add enough water to make the batter of medium thickness - if it is too thick the moode will turn hard. Too thin and the batter will likely seep out of the mould. To test, take some batter and drop it from a height - it should fall in a thick, steady stream. Use your hand to lightly yet swiftly mix the two batters. 
6. Cover the pan with a lid and keep it undisturbed in a warm place of your kitchen. If you wish you can keep it in the oven which has only the light switched on. 
7. The batter can take anywhere between 6 - 12 hours to ferment. In colder temperatures or central AC it can take upto 14 hours. 
8. When the batter has fermented prepare the steamer for steaming the moode
9. Place sufficient water in a steamer and let it come to a gentle boil. Place a metal stand (used to keep hot vessels on the table) at the bottom of the steamer and over it place a round steel box big enough to accommodate the moulds.
10. Pour the fermented batter into each mould upto two third's full. Don't be tempted to pour a lot as the batter will rise and spill out.
11. Let the water placed in the steamer come to a full, rolling boil (steam comes out). Cover the steamer with its lid and let it steam for about 45-50 minutes. You can check around 40 mins by inserting a knife or skewer into the moode. If it comes out clean it is done. 
12. Before serving unwrap the leaf, cut into desired sizes and serve hot with chicken or vegetable curry of your choice. Moode may be eaten with chutney as a breakfast option.

Notes:
1. For softer idlis I have read a tip that calls for washing and soaking the urad for the last 1 hour before you start the grinding process. It is important to soak the rice and urad separately so that you can grind the urad separately too, so do not mix them both
2. If the weather outside is hot and the mixer jar tends to heat up quickly try using chilled water to grind the rice/urad. If the temperature is too hot it could kill the live cultures in the urad that aid quick fermentation. If you are living in central AC, try using lukewarm water to grind.
3. If you are using beaten rice, grind it along with the rice.
4. If you wish you may place ramekins (individual sanna moulds/bowls) inside the steel box placed in the steamer and then position each moode mould inside each ramekin - this is to help the moode mould from toppling over.

Cabbage Miryapito ~ Mangalorean Catholic Style Pepper Cabbage (Using Stew Powder)

$
0
0

Until a few years ago the only cabbage preparation that I knew to make was the very typically Mangalorean style vegetable thel-piao or oil & onion method which is more like a saute. To be honest, it does not involve any process of sauteing. All you need to do is dump the ingredients in a pan, sprinkle some water and wait for the veggies to cook until limp. After some generous sprinkling of coconut it was ready to be served. This is one of the two ways that mum used to prepare it at our place. The other was more like a fugad minus the coconut where some red chillies were tossed in hot oil before the cabbage was added. Either ways, I never complained as I love vegetables. The only vegetable I didn't touch during my childhood was the bitter gourd for obvious reasons. I took to enjoying it only after I began to manage my own kitchen and wanted to experiment with all kinds of vegetables.
When I was expecting my daughter I had a lady come to help me with the baby. She hailed from the western ghats of Karnataka and was a great cook. I learnt many a dish from her and especially this pepper cabbage which she prepared using her own home ground spice blend. It was the stew powder which she made and enjoyed adding to many dishes including the pork bafat! However, we dissuaded her to do so as the pork bafat used to end up tasting something else without mentioning the additional amount of spice which our palates couldn't take!

The spice blend that she prepared at home had a heady pungent aroma of freshly ground pepper to which some roasted cumin was ground and added. For some reason I totally missed to ask her the proportions of this blend but I am positive that it was our typical stew powder albeit with a higher ratio of peppercorns to other ingredients thus making it very potent.


Since I love spicy food I used to enjoy the fiery pepper cabbage that she used to cook for us. Ever since she left I have been meaning to re create the blend but couldn't get around to doing it. On my recent trip to Mangalore I simply picked up a packet of ready made stew powder which were are thoroughly enjoying in our dishes now. It is simply marvellous, reminds me so much of my mom's cooking as she used to use this blend in most of her dishes giving it a unique twist. In fact, something as simple as a fried egg tasted so yum when stew powder was used instead of regular pepper powder. I have begun to do that now. Pepper, cumin and turmeric are nature's cure for so many common ailments that it never hurts to get a daily dose of some. 

For those who have no access to stew powder or until I share the recipe for a homemade spice blend I have given an approximation of how you can make it at home using powders. It makes just a small batch for one time use. Do feel free to alter the proportions to your liking. You may add more pepper powder if you so desire or like the dish to be fiery. Do take care not to go overboard as the dish will burn your throat as pepper can turn out to be more pungent than the spice that regular chillies (red or green) provide.


Like this recipe? Do checkout my Veg Recipe Index

Cabbage Miryapito ~ Mangalorean Catholic Style Pepper Cabbage (Using Stew Powder)


Ingredients:
  • 500 grams cabbage 
  • 1 medium-big onion finely chopped
  • 1 large tomato finely chopped
  • 1-1/2 inches ginger finely chopped
  • 1/2 teaspoon cumin/jeera
  • 1 sprig curry leaves (optional)
  • 2 teaspoons Mangalorean stew powder * see notes
  • 2 tablespoons oil
  • salt to taste
Method:
1. Cut the cabbage into cubes or large chunks then disintegrate the layers. Transfer into a pan with plenty of water. Add salt, vinegar and turmeric and keep aside for 15-20 mins (to help get rid of bacteria & other crawlies). Discard the water and wash in two changes of water and place on a colander to completely drain off the excess water
2. Heat oil in a heavy, wide based pan or kadhai. Toss in the cumin seeds and let them sizzle for a couple of seconds. Then add the curry leaves if you are using them.
3. Reduce the heat and add the chopped ginger and fry it on a medium heat for half a minute. Next fry the onions for a good 5-7 minutes or until they turn translucent and slightly golden in colour.
4. Now add the tomatoes and a little salt and fry them till they turn mushy and the excess water dries up. You will notice that the tomatoes when fried really well begin to look oily. This is an important step as you need a good masala base as the cabbage itself does not release any stock or a lot of flavour of its own.
5. Add the stew powder and fry for 4-5 seconds - take care not to let it get burnt.
6. Add the washed & drained cabbage and mix everything well. Sprinkle not more than 2-3 tablespoons of water to help create steam in which the cabbage will cook. Adjust salt to taste. Stir every now & then and let it cook on a medium heat till done. * see notes
7. Garnish with chopped coriander and serve hot with rice or chapathis

Notes:
1. Mangalorean style stew powder is a blend of peppercorns, cumin and turmeric along with spices such as cinnamon & cloves. If you are using store bought blends you may find many other ingredients such as the poppy seed. To make a small batch of stew powder for a single use (for this recipe), take 1-1/4 teaspoons roasted cumin/jeera powder, 1/2 teaspoon freshly ground (fine) pepper powder, 1/4 teaspoon turmeric (haldi) powder and just about a pinch of garam masala powder - if you have clove and cinnamon powders, you may use them instead of the garam masala powder. This is just an approximation although I always use stew powder that we prepare in bulk. I will post the recipe for it shortly.
2. I prefer cabbage that is not overcooked and limp, so I usually cook it till it is just about crunchy and still has some amount of firmness to it.

Like this post? Click to stay connected!

Follow me on Facebook Follow me on Twitter Subscribe via Rss Google+ Follow Me on Pinterest

Homemade Chicken Nuggets with a Twist! (And Oh-So-Simple!)

$
0
0

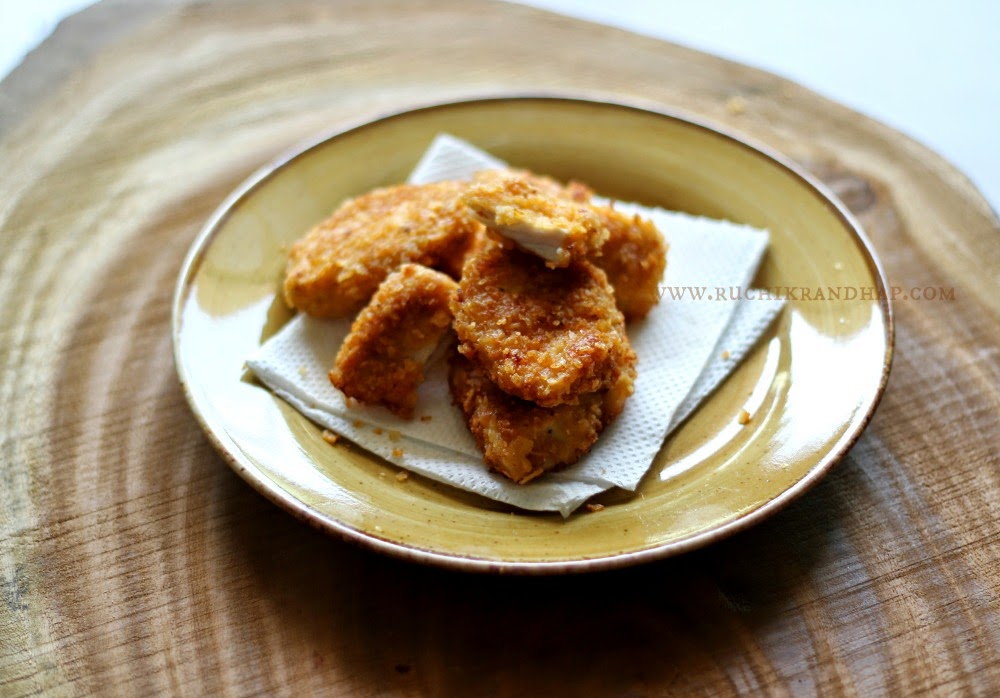
Another week has gone by and right after I finish with this post I plan to do a million things. The first one on the list is to tune back into the 'school routine' mode. Besides this I'll have to chalk out a rough list of sandwiches and other lunch box items that I'll have to prepare during the upcoming week. A couple of weeks ago I tried making chicken nuggets at home. I was randomly browsing some cooking videos at home and chanced upon one by chef Nicko of Nicko's Kitchen and I wanted to try it out immediately. The process was very simple and the result very delicious and healthy.


Making things from scratch doesn't take as much time as we believe. Working parents usually like to stock up on frozen treats especially chicken nuggets for their little ones. It is a good lunch box treat as well as an anytime snack. It also doubles up as a goodie on the kiddie meal menu for a birthday party. I have bought them and stocked them up for as long as I can remember. But I always had this gut feeling that nuggets were not really healthy as commercially available ones are made using up leftover chicken pieces that were ground up and shaped into nuggets, breaded and then frozen - ready to be fried or deep fried and served. 


Now that we tried making them at home I will never go back to store bought nuggets - EVER! When I made the nuggets at home I knew that I was preparing a wholesome meal for my children. The fact that fried foods are not the healthy is slightly pardonable when you know what's going into that stuff in the first place. Secondly, there is no grinding involved in this recipe. All you have to do is cut up slightly thin chunks of boneless chicken, the shape doesn't matter, they are supposed to be nuggets after all. A simple marination and a brilliant idea for a coating later what you have is yummy chicken ready to be gobbled up. Bite after bite it is nothing but delicious goodness of chicken. You can make these fresh or save yourself some precious time during the week by preparing them in advance over the weekend and freezing them in freezer safe containers - just make sure you place them in batches separated by baking parchment/butter paper or plastic sheets and you are certain that they don't stick together


These nuggets were so tasty that they didn't quite last the photo shoot so I barely got any shots. My little one just ate nuggets all day and refused to eat her lunch. For once I didn't complain. I knew for sure that she was having a filling, homemade snack!


Homemade Chicken Nuggets with a Twist! (And Oh-So-Simple)


Ingredients:
  • 500 grams tender boneless chicken (preferably breast fillets)
  • 1/3 cup plain flour / maida
  • 1 large egg or 2 small ones, lightly beaten
  • 150 - 175 grams potato chips / crisps (I prefer Lays, any flavour) * see notes
  • salt & pepper to taste
  • oil for shallow frying
Method:
1. Cut the chicken into nugget sized pieces. Make sure they are as even as possible in terms of their thickness. Slices of medium thickness would be perfect as they will cook faster.
2. Wash the chicken and allow it to drain on a colander. Pat dry with a clean kitchen towel or tissue if required.
3. Marinate the pieces with salt & pepper and keep aside for anything between 20 mins - 4 hours.
4. Prick a small hole in the bag of chips, let the air escape so that the packet shrinks. Then take a rolling pin and thrash the chips till they evenly turn into a powder - go ahead, take all your frustration on them!
5. Place the flour, beaten eggs and the chips powder in three shallow plates.
6. Coat each chicken piece in the flour (shake off the excess), then dip it in the egg solution and finally coat it with the chips mixture. Place on a plate. Repeat the process till all the chicken is used up.
7. Heat oil in a skillet and shallow fry the chicken nuggets on a medium heat till they turn golden on both sides. * see notes.
8. Serve piping hot with some ketchup or cheese dip or eat them plain or as an accompaniment to your meal.

Notes:
1. The flavour of the chicken nuggets can be so versatile - use your favourite flavour of Lays chips! My favourite is Sour Cream & Onion. In the above pictures I used Lays Chili flavour. Any flavour works well. If you wish you can add some chilli powder at the marinating stage (don't make it too spicy if you are serving the nuggets to young kids)
2. For shallow frying use plenty of oil in the skillet. Don't gasp! You need to use a little extra oil than you normally would for shallow frying. To make the process less sinful once you are done with the frying tilt the frying pan at an angle so that all the oil drains to one side and the nuggets on the other - this helps the nuggets to release any excess oil. You can also place them on absorbent kitchen tissues before serving.
3. Ensure that the heat of the oil is maintained at a medium. If the oil is too hot the nuggets will burn quickly on the outside and remain uncooked on the inside. I usually like to flip them once after the first minute and then flip them back again and then again- so each side receives heat twice.
4. To freeze the nuggets simply place them in a box and stack them up using a butter paper / baking parchment (or even freezer safe plastic sheets) in between. I usually store stacks of 6 per level. This helps you remove only the desired number of nuggets for frying and they don't clump together. 

Chilli Cheese Toast with a Twist! ~ When the Hubby Cooks!

$
0
0

We were not friends with paneer for the longest time. Then it slowly started to make its appearance in our home. Personally I never fussed about eating paneer no matter how it was cooked and how creamy (or not) the paneer was but the husband used to hate paneer thanks to the chewy store bought ones which were hastily cooked by caterers at the mess he used to eat at before he got married. However, since I like to include all kinds of ingredients in the meals we eat I slowly started experimenting with it. As thousands of paneer lovers will agree with me, homemade paneer is the best but in lieu of that I guess fresh, store bought paneer that has been sourced from a reputed dairy is the next best solution. 

So after all this hullabaloo about not liking paneer, guess who made these toasts? Roshan of course! He is a paneer convert now (well almost!). We made this when we had some tiny guests for a tiny party at home earlier this year and since that day it has been a major hit with the kids asking us for it every time they visit us and squealing in delight when we take some on picnics or long drives. 


The nicest thing about this toast is that it is so party friendly - which means you don't kill yourself making everything at the last minute. You can make the topping ahead of time (minus the onions), trim and cut the bread to size a few hours before you intend to bake them. When you are ready to serve just mix the onions in and pop the tray in the oven, let the cheese sizzle and turn golden and serve them hot and crisp. They taste SO WONDERFUL with a hot cuppa. I have eaten them so many times because personally I don't like an overdose of cheese which is typical of chilli cheese toasts but the paneer balances out the richness and makes it well, eatable :) and yeah, less salty which the cheese is notorious for.

The nicest thing about this toast is that you can decorate it like a bride. Make it look as pretty as you want. Add ingredients of your choice - perhaps some boiled corn or chopped dill, colourful bell peppers or even bacon - get creative...all the way!


Folks, I've been a bit behind schedule as far as replying to emails is concerned. If there is something urgent (queries or help with recipes) please message me on my Facebook page. You may also write to me at ruchikrandhap@gmail.com with 'Urgent' or 'Query' written in the subject line so that I can prioritize my replies to such emails.

To all those of you who have written to me so far and not yet received a reply, I'm getting there...one mail at a time :) Thanks for your patience and time. I appreciate it very much!

Chilli Cheese Toast with a Twist!


Ingredients:
  • 9 slices of bread, brown or white as desired
  • 200 grams fresh paneer (Indian cottage cheese), crumbled
  • 100 grams cheddar or parmesan cheese, grated
  • 100 grams mozzarella cheese, shredded
  • 2 small cloves of garlic, minced
  • 1/2 small onion, finely chopped
  • 1 small green chilli, deseeded and minced
  • 1/2 bell pepper (red, yellow or green capsicum), deseeded and chopped * see notes
  • fresh coriander, chopped
  • salt to taste
Method:
1. Preheat the oven to 200 degrees C.
2. In a bowl mix all the ingredients mentioned above except the cheddar and mozzarella cheeses and the coriander. Spread the slices of bread on a baking tray.
3. Cover the surface of each slice evenly with the prepared mixture. Next, sprinkle the cheddar or parmesan cheese over it, then the mozzarella cheese and finally garnish with the chopped coriander.
4. Place the tray on the top rack of your oven and use the broil/grill mode to grill the cheese toasts for just about 5-7 minutes or till they turn golden on top (not brown) - the time will depend on the size of your oven and mode used (I use the grill-fan mode which helps speed up the process in my oven). I suggest you keep an eye out and don't neglect the grilling process. Cheese gets burnt very fast.
5. Once done, remove from the oven and cut each slice into triangles using a pizza cutter or a sharp knife.
6. Serve hot with a cup of tea or coffee.

Zero Oil Sardine Fry ~ When The Hubby Cooks!

$
0
0

Apparently today is World Heart Day. Yayy to that! Well, this is a topic close to my heart (pun unintended!) as I have a history of heart problems on my dad's side and I have been warned by all and sundry to eat healthy and stay fit. While it is a constant battle to choose healthy food over unhealthy (read baked goodies) I do make an effort to eat healthy at home. As a parent I need to lead by example so I firmly believe that if I eat trash then I have nothing to teach my kids about eating well. Anyway, we aren't such big health freaks either as is evident from my blog. We love food and we love to cook and yes, we love to eat so we do indulge in calorie rich stuff once in a way and most certainly when we eat out or are on vacation. Having said that, I do want to make an effort to keep our home cooked menus as grease free as possible. Keeping this in mind we decided to try out this lovely recipe handed over by my mom in law. It makes use of no oil to fry sardines. 


Sardines they say are one of the world's healthiest foods, rich in Omega 3 fatty acids, vitamins B12 and D amongst many other nutrients, so why kill half of them by overcooking/frying them in tons of oil? 

No oil in frying? Air fryers are a rage, I agree but no, this recipe does not require an expensive gadget. All it needs is banana/plantain leaves, lots of time and tons of patience. Since there is no oil used the sardines are tucked away in a blanket of banana leaves and slow cooked. This helps release natural fats and oils from the fish which help cook it, not to mention the steam which is generated by tucking them inside the banana leaves. 


The fish is cooked so slow that the exterior turns slightly crispy while the flesh inside remains simply succulent and juicy. This is the magic of food cooked in banana leaves I guess. The leaves have so much character and strength that they can withstand the intense heat without burning/crumbling. I can only talk about the aroma of these mildly fragrant leaves that lends itself to the food that's cooked in making it so appetising. Yum! You need to eat it to believe it. 


A big thank you to my mum-in-law for helping me discover this great technique. This is probably the best way to fry sardines with all the nutrition retained. I am definitely making more of this in the future.  Love sardines? Try this!


Zero Oil Sardine Fry 

Prep time: 15 mins | Frying time: 25-30 mins on a very slow heat

Ingredients:
  • 7-8 big sardines * see notes
  • large banana leaves cleaned and cut to size
For the masala/marinade (makes more than required for this recipe, refrigerate the rest)
  • 30-45 long dried red chillies * see notes
  • 1-1/2 teaspoon coriander seeds
  • 1-1/2 teaspoon mustard 
  • 1-1/2 teaspoon cumin 
  • 1/2 teaspoon turmeric powder
  • 10 flakes of garlic
  • 1 inch fresh ginger
  • 2 marble sized balls of tamarind (adjust to taste)
  • salt to taste (you may skip this in the ground marinade and apply it directly on the fish)
Method:
1. Descale and clean the fish in a few changes of water. Allow to drain on a colander. If you wish, apply the salt to the fish in which case, do not add salt to the marinade
2. Grind all the ingredients mentioned under 'For the masala/marinade' to a smooth paste and marinate the cleaned sardines with this masala. Keep aside at least for 20-30 minutes to help the fish pull the spices.
3. Set a skillet on a medium high heat and place one piece of the banana leaf on it. Place the marinated fish over it, do not crowd the pan. Cover the fish with another banana leaf.
4. Reduce the heat completely and let the fish fry slowly - this could take a long time but its worth the patience. Around 10-12 minutes into frying time flip the whole packet using a large spatula and let the fish cook on the other side.
5. When done, serve hot with rice and curry of your choice.

Notes:
1. Big sardines are roughly palm sized or the size of small Indian mackerels.
2. We used Kashmiri chillies, you may use a combination of Byadge & Kashmiri chillies, depending on the level of spice you prefer. Kashmiri chillies are lower on spice as compared to the Byadge variety.
3. The recipe for the marinade can be scaled down to approx 1/3rd of the quantity given if you wish to make a smaller batch but I doubt you will be able to grind such a small bunch of ingredients effectively. If you can, please go ahead.


Dahi Kadhi (Yogurt Based Vegetable Curry)

$
0
0

One of our most favourite activities as a family is to travel and see the world. We have just returned from a lovely vacation in Oman over the weekend. Our family friends cum relatives invited us and we gladly accepted the offer. Oman was one of the places I looked forward to seeing as I had browsed through some awesome pictures of that place a few years ago. However, it was a place I had noted in my list and didn't think I would see this soon. Glad that the trip happened although it was pretty short. We got to visit some important landmarks in and around Muscat city and also had a weekend getaway to a beach resort. So yeah, everybody is happy - the kids enjoyed their break and so did we. Most importantly its the food that entices me on any holiday. While there wasn't a lot of seafood on offer at the resort (and plus I was on a diet - more on this later) I enjoyed whatever I got.


However the best part of a holiday is coming back to the comforts of your own house. Isn't it? When we got back yesterday I quickly set about clearing the place and tackling the mountain of holiday laundry and then whizzed through my chores in the kitchen that included making this simple yogurt curry that my family loves. It tastes wonderful with rice or chapathis and is a perfect meal solution on days when you don't have the time to make anything elaborate. What's more, its healthier than most preparations as you are not using any extra oil to fry stuff. If you skip the tempering or reduce the oil it turns into something very suitable to be eaten by dieters. 


My friend Savri had told me about this many moons ago and only then I recalled how my mom used to put a similar curry together occasionally. I need to get her recipe too as I believe she used ground coconut in the preparation. My lovely neighbours here who I meet in the mornings also highly recommended adding the ash gourd for its simplicity and how it totally transforms the curry into something so delicious, so that's exactly what I did and the outcome was yum!


Dahi Kadhi (Yogurt Based Vegetable Curry)


Ingredients:

  • 1-1/2 cups thick curds/yogurt
  • approx 2 cups water * see notes
  • 1-2 small green chillies minced * see notes
  • 1 inch ginger minced * see notes
  • 1 tablespoon gram flour / chickpea flour / besan / kadale hittu
  • 1-1/2 cups peeled and cubed ash gourd (winter melon) or mangalore cucumber (field marrow)
  • salt to taste

For tempering:

  • 1/2 teaspoon mustard
  • 1/2 teaspoon cumin
  • a generous pinch of asafoetida / hing
  • 1 sprig of curry leaves
  • 2 dry red chillies broken
  • 2 tablespoons chopped coriander

Method:
1. In a heavy based pan/kadhai place the cubed vegetable and sprinkle a little water (about 1/2 cup) and salt to taste and cook till tender.
2. Meanwhile whisk the yogurt to a smooth lump free consistency and add the water (*see notes). Add the ginger - green chilli paste (or chopped), gram flour and whisk till everything is mixed and there are no lumps.
3. When the vegetable is cooked and tender, reduce the heat completely and add the yogurt mixture - pay attention at this stage as yogurt can curdle very quickly if the heat is too high. Ensure that the mixture does not come to a boil, lightly stir with a ladle. Let the gravy simmer for about a minute and then remove the pan from the heat and set it aside.
4. Heat a small pan for the tempering and add the oil. Toss in the mustard, when it stops spluttering add the cumin, let it sizzle for a couple of seconds and then add the curry leaves, broken chillies and toss them around in the hot oil for a few seconds. Finally add the asafoetida and remove the pan from the heat - add this tempering to the curry.
5. Garnish with chopped coriander and serve hot with rice.

Notes:
1. If you wish you can use ginger & green chilli paste if you are in the habit of preparing it (most Gujarathi households prepare this and use it as required in several dishes) - in which case you can use about 1/2 teaspoon of this paste (or to taste) instead of using minced ginger & green chillies as given above.
2. You can adjust the consistency/thickness of the gravy by adding 1-2 cups water, but do remember that the vegetable also releases some water, so you need to adjust accordingly here.
3. It is ideal to serve this dish a couple of hours after it has been prepared as it helps the vegetable to absorb the yogurt and spices well. You can substitute the ash gourd/field marrow with slices of brinjal (aubergine/egg plant) marinated lightly in red chilli-salt paste, shallow fried and then added to the curry. In this case you need to prepare the curry first and add the fried pieces later and then temper the gravy. 

Chicken Rolls

$
0
0
The best memory of a 'roll' that I can pull out from the depths of my mind is that of my friend's birthday party when I was in class 6. Poonam was one of the affluent girls who lived in my grandma's neighbourhood and hence birthday parties were a common thing for her unlike me who never had birthday parties as a child. That was not the norm in those days, especially not for middle class

Kashi Halwa ~ Karnataka Style Ash Gourd Halwa

$
0
0
That time of the year that everyone eagerly waits for is here. The festive season is finally here!! Eid just went by, Diwali is just around the corner and before we know it we will be celebrating Christmas and New Year! It has got to be my most favourite time of the year. I got into this mood last month when I was flipping through my collection of recipes debating on which sweet I should

Khara Kaddi | Kara Kaddi | Spicy Sticks

$
0
0
Khara Kaddi is probably one of the most loved dry snacks in Mangalore. It is usually available in bakeries and since it was never prepared at home (my mum didn't prepare a lot of deep fried snacks) we usually bought it only when we had guests over. Dry snacks such as the Khara Kaddi, Sontay (deep fried sweet potato sticks), Shemey (plain sev), Masala Kadale (spicy peanuts) or Corn Mixture (

Mangalore Peda | Besan Peda

$
0
0


As we are inching closer to one of the biggest festivals of India my news feed on Facebook is being bombarded with all kinds of recipes - sweet and savoury. It is almost impossible to turn a blind eye to them. It makes me simply want to try them out but then I tell myself to focus and stick to the list of goodies I have already planned to prepare. While most of my experiments are good to go on the blog some of them fail to impress and so those are struck off the list making way for more goodies until I try them again (and again). Well, I have been trying to get a particular Mangalorean sweet right and somehow it has not impressed me to the extent of being posted on the blog. Today on its second attempt I realised that I couldn't go on trying the same dish so many times as I am running short of time to post the rest of my recipes (you know how much I love blogging, don't you?) just in time for Diwali. Although we don't celebrate it at home I just love this excuse to make sweetmeats at home. 
CONTINUE READING »
Viewing all 331 articles
Browse latest View live